A beginner’s guide to trading on 1inch

As the DeFi space is booming, more and more newcomers are taking a stab at crypto trading . 1inch is a perfect place to start off in the crypto industry for those who have little or no experience with cryptocurrency.
As the leading aggregator of decentralized exchanges (DEXs), 1inch offers users better rates for cryptocurrency swaps than any single crypto exchange could. Moreover, 1inch saves users time — as they no longer have to manually check each exchange for the best swap prices.
In this post, we’ll provide a step-by-step guide on how to trade on 1inch, which should come especially handy for newcomers.
Step 1 — Сonnecting your wallet
- go to 1inch.io
- click on the ‘Connect wallet’ button in the upper right corner
- read and accept Terms of Service, Legal Disclosure and Privacy Policy.
- choose your waller (e.g. Metamask) in the popup window
- hit the ‘Connect’ button.
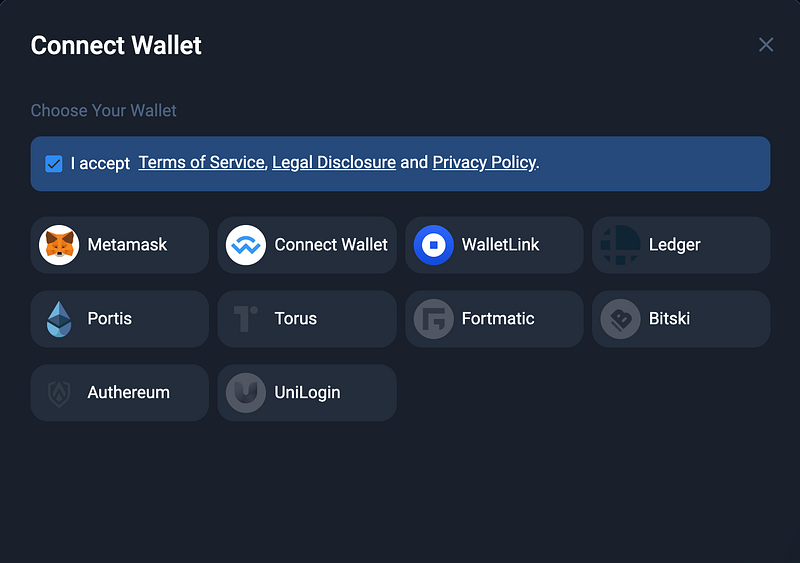
Once the wallet has been connected, your Ethereum address will be displayed on the top of the page. By clicking on it, you can always check your transaction history, copy the address or disconnect the wallet.
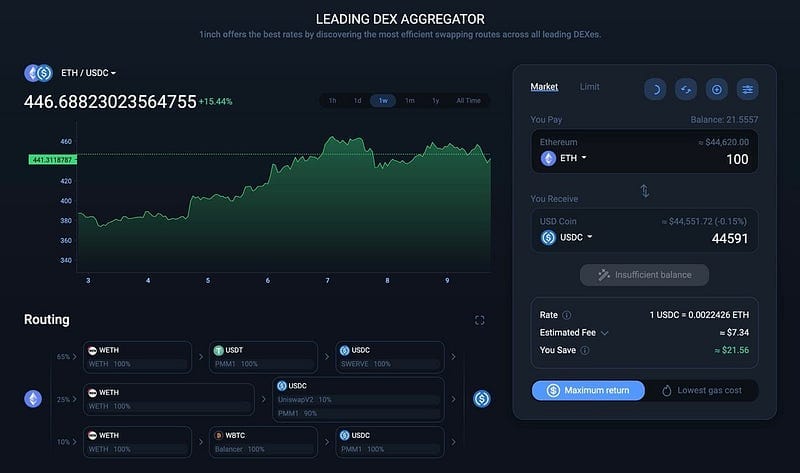
Step 2 — Basic settings
Choose the coin you have and the coin you want to get in the dropdown windows:
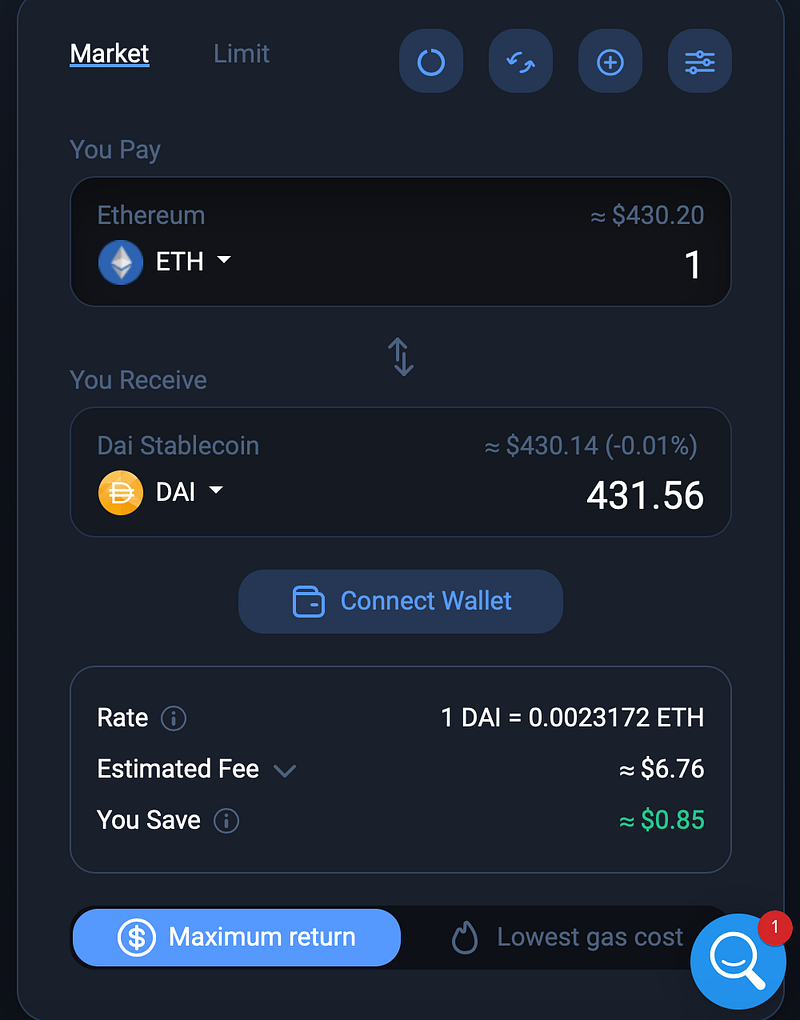
You can also choose between the ‘Maximum return’ and ‘Lowest gas cost’ options. If you choose the ‘Maximum return’ option, the algorithm will use complex routes for the swap to make sure that you get the best rates.
Alternatively, you can go for the ‘Lowest gas cost’ option. In that case, the pathfinder algorithm will find the best option in terms of gas costs. This option comes in handy for small trades when you don’t want to pay substantial fees, like, for instance, swapping 10 USDT to WETH. Small trades optimize less liquidity sources and thus the lowest gas cost option will most likely deliver the best end price.
Step 3 — Advanced settings
1inch enables you to do more advanced settings. Hit the ‘Advanced settings’ button in the upper right corner of the swap console.
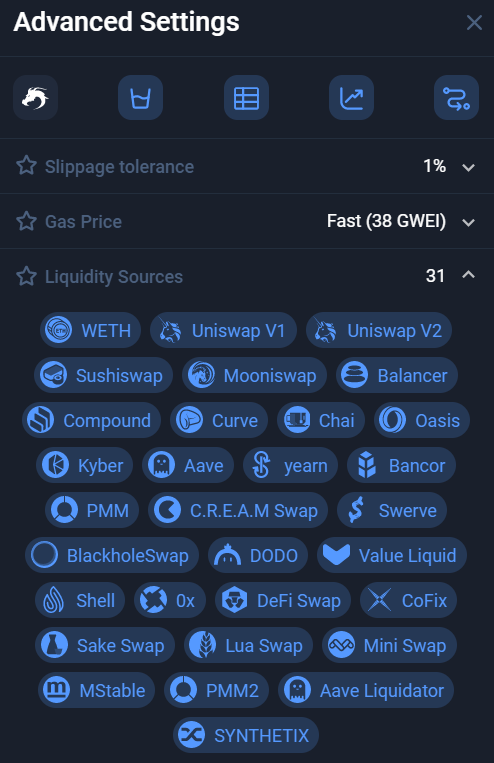
The ‘Activate CHI’ button allows you to activate the CHI gastoken. Burning the CHI gastoken can reduce gas costs by 43%. To activate and receive the benefits of CHI, the user should begin with a CHI balance of at least 5 CHI. Read more about 1inch’s CHI gastoken here.
The ‘Disable partial fill’ button disables the particle fill feature, which is enabled by default. The partial fill feature can fill a swap order only partially — in case the rate in one or more routes has changed, becoming less attractive for the user. Thanks to the partial fill feature, any route can be easily cancelled, and the user’s unswapped coins will return to their wallet.
The advanced settings also allow a user to see a comparison table, charts and the entire routing for the swap they want to do.
With the advanced settings, the user can set slippage tolerance, the gas price and choose between the 31 liquidity sources 1inch offers.
The slippage tolerance feature allows the user to select their swap’s level of slippage. The user can choose: 0.1 %, 0.5%, 1 %, 3% or they can enter a custom amount. If the rate changes more than the selected percentage of “slippage tolerance” during the execution of the transaction, the transaction will be partially filled or reverted to save user funds
Step 4 — Swap
Do the swap and enjoy the best rates and shortest possible response time!
We received awesome feedback from our friends in DeFi!
The trading functionality described above is also available in the 1inch Wallet for iOS: https://jn3rg.app.link/YBe9sJskRkb
Download it and enjoy lucrative trading via 1inch!
Share the article